The perfect set of custom press on nails starts with good measurements
Follow our tutorials below to nail down your perfect size!
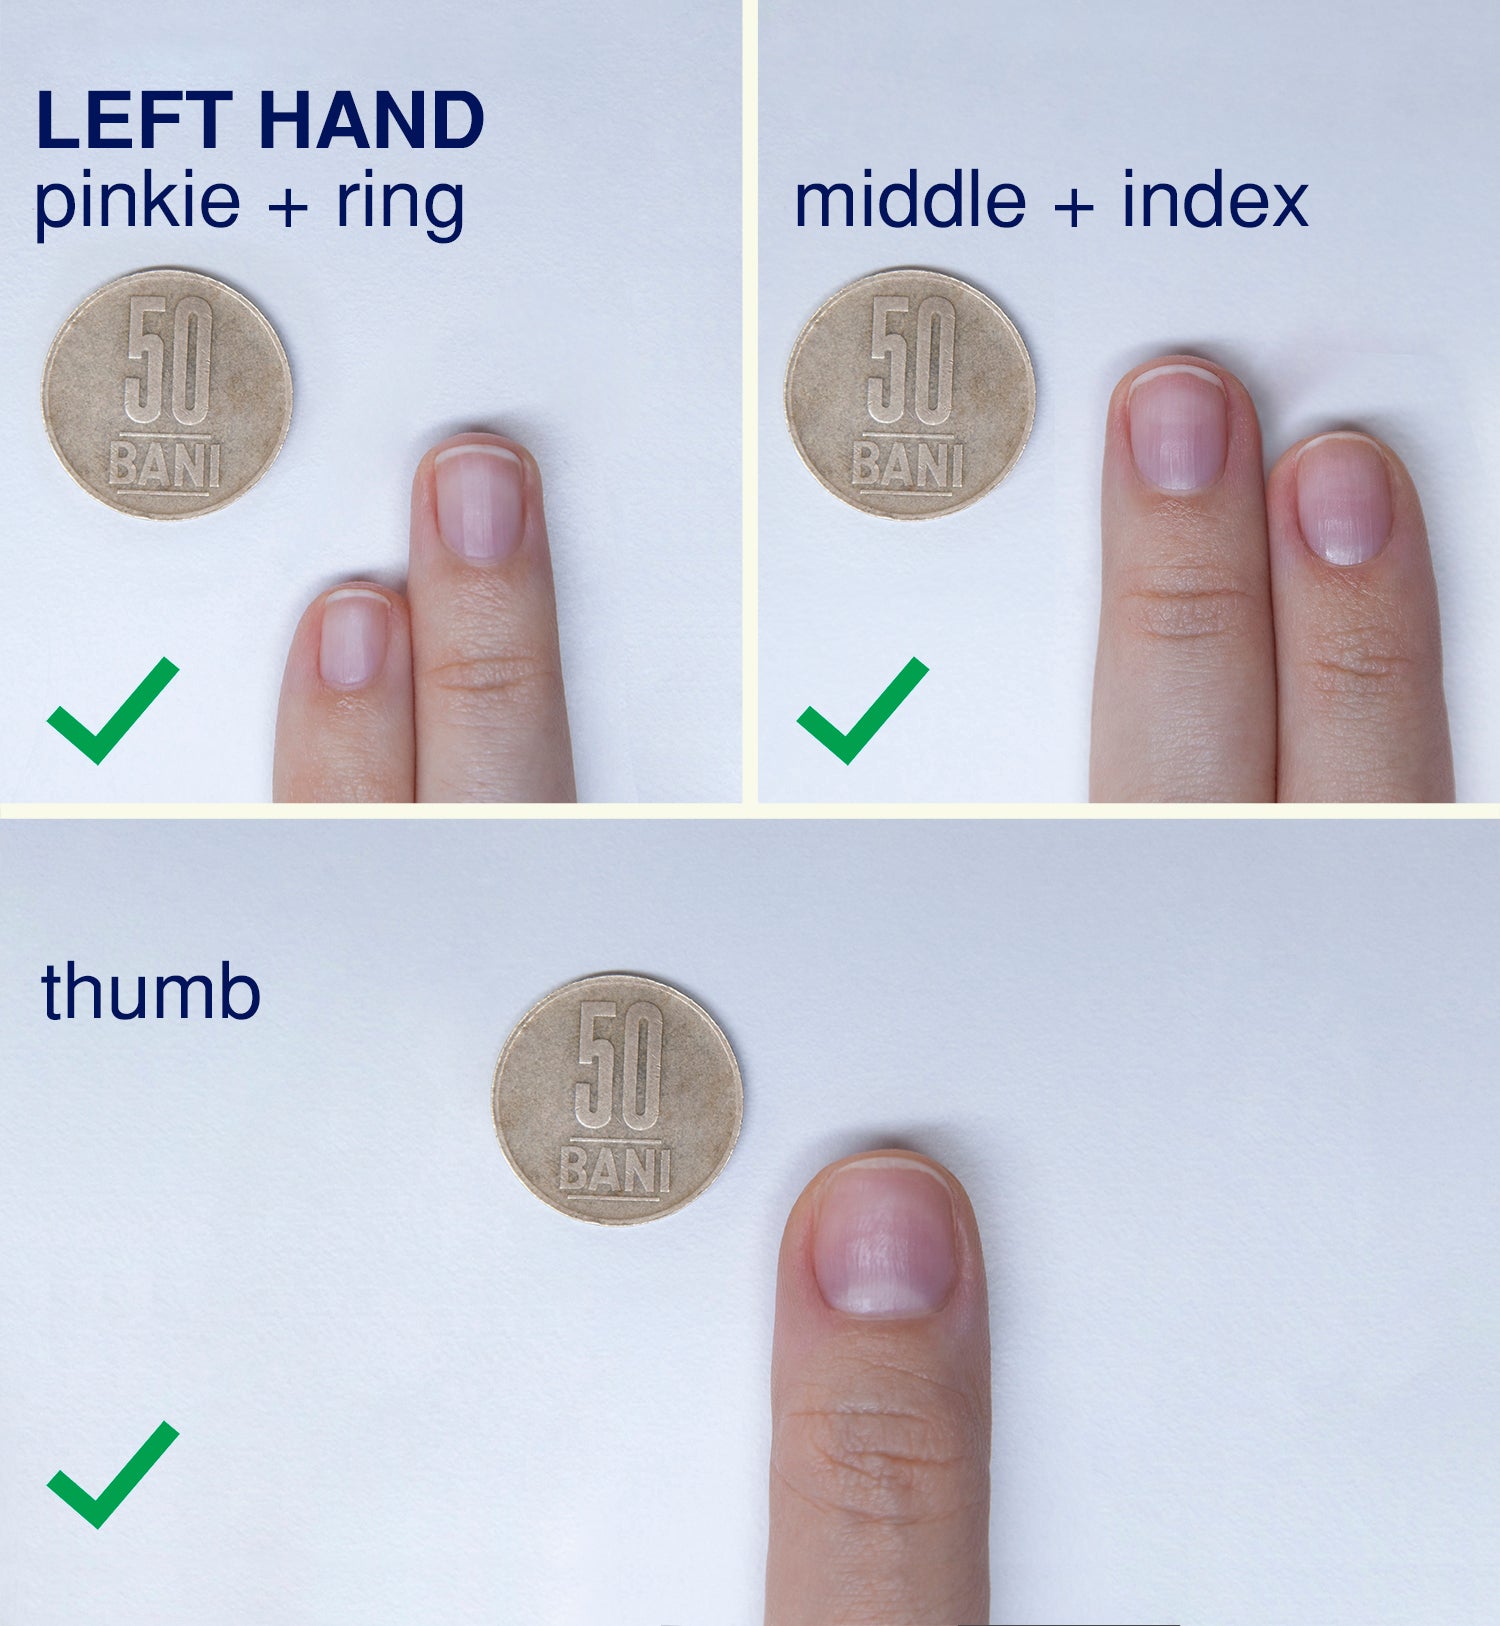
Reference Photos!
In order to pick the best sizing for your press on set, we will be needing some reference photos of your natural nails.
Just like the example shown here, take three perpendicular photos of each hand. You can group them as thumb, index+middle, ring+pinkie, with a coin right next to them. Preferably use a coin that is either one of these currencies: 50 bani, 1 euro, 2 euro, 50 eurocent, U.S. nickle, U.S. quarter.
Please make sure your photo is well lit, crisp, unfiltered and that there are no harsh shadows.
Make sure the coin is a perfect circle in the picture, not an oval.
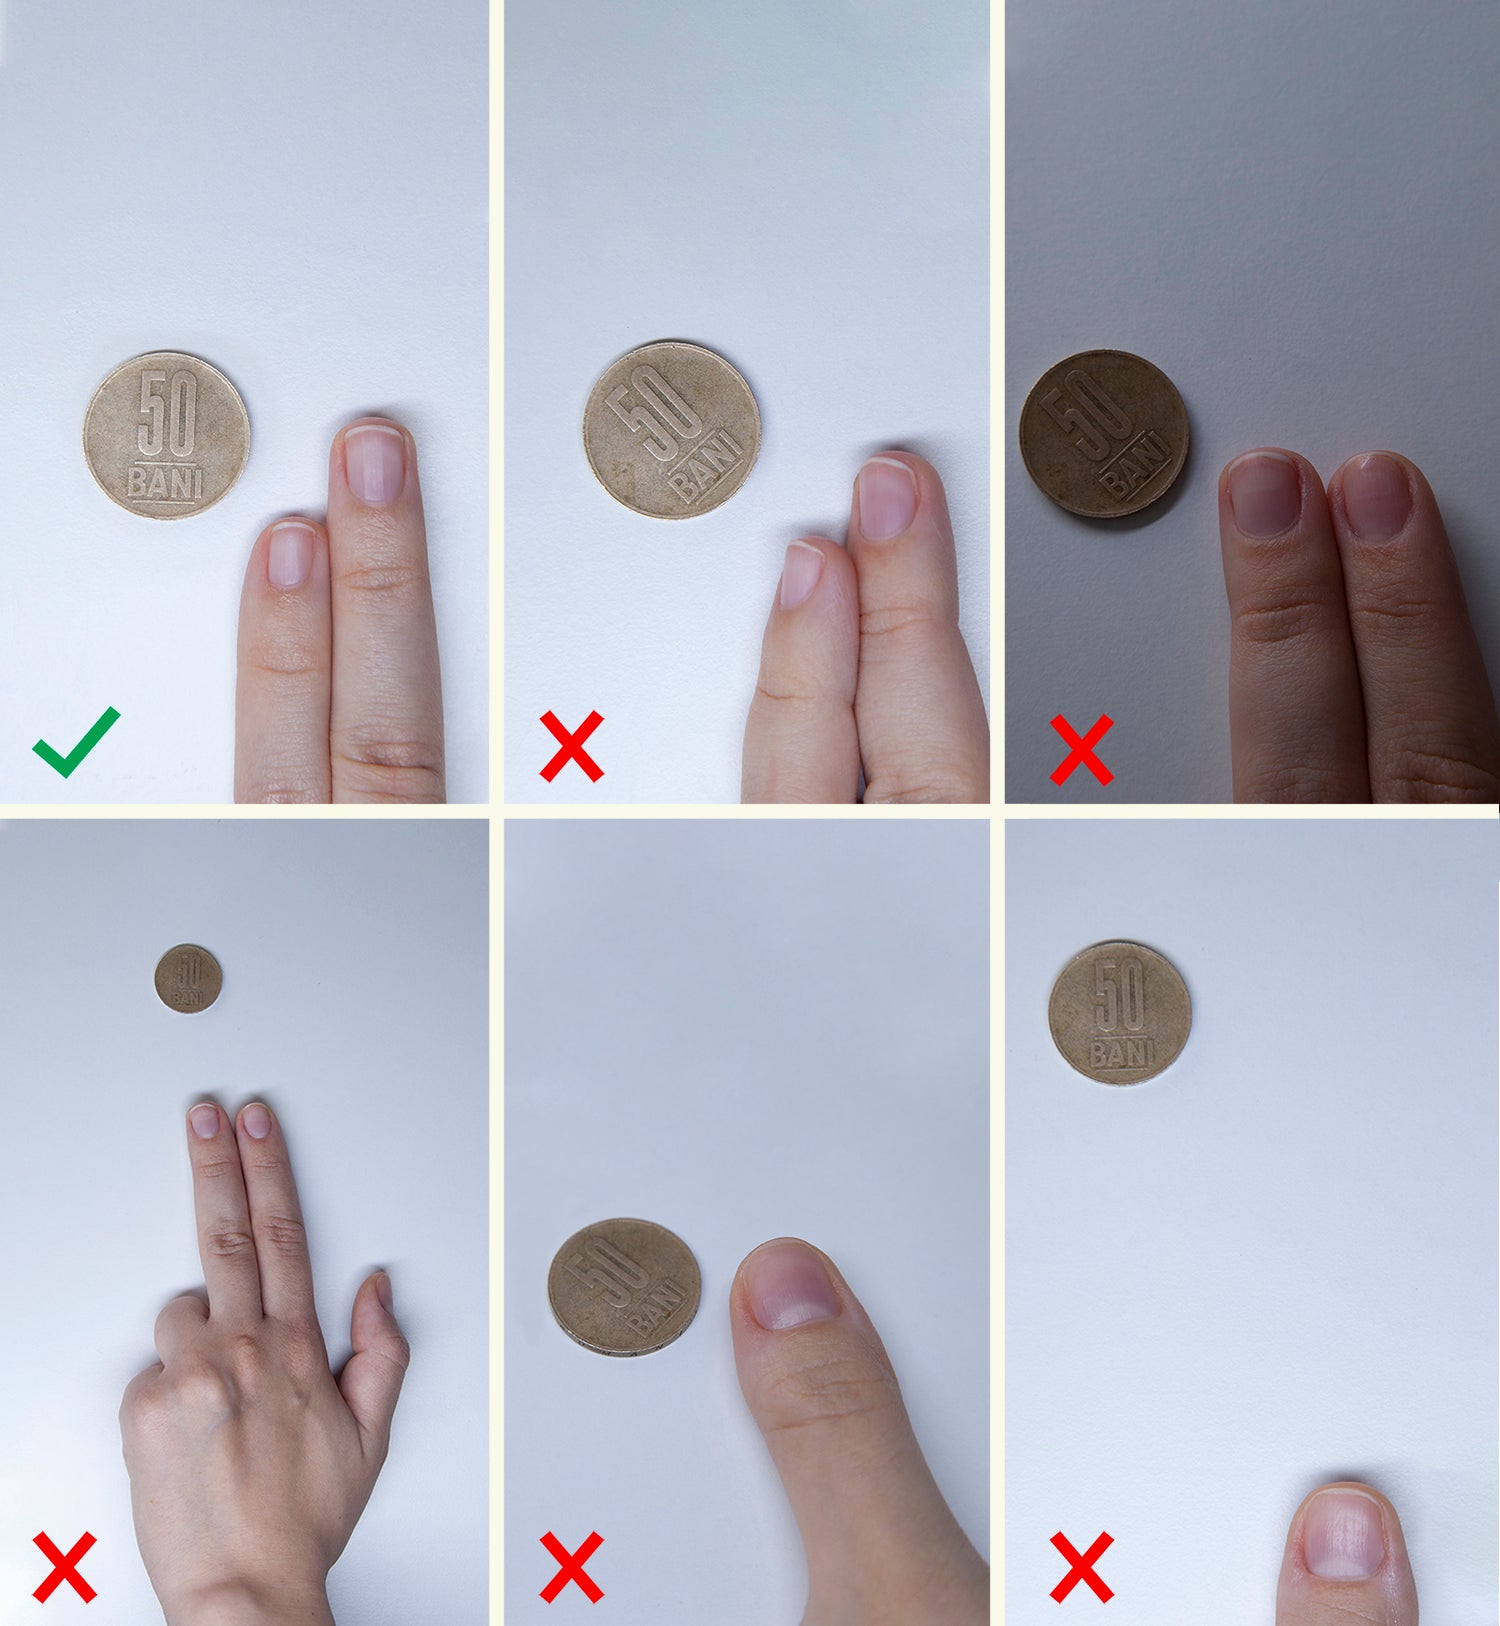
Make sure:
That your reference photos are:
- clear
- without harsh lighting
- without shadows
- well lit
- the coin is close to your nail
- the coin is a perfect circle, not an oval
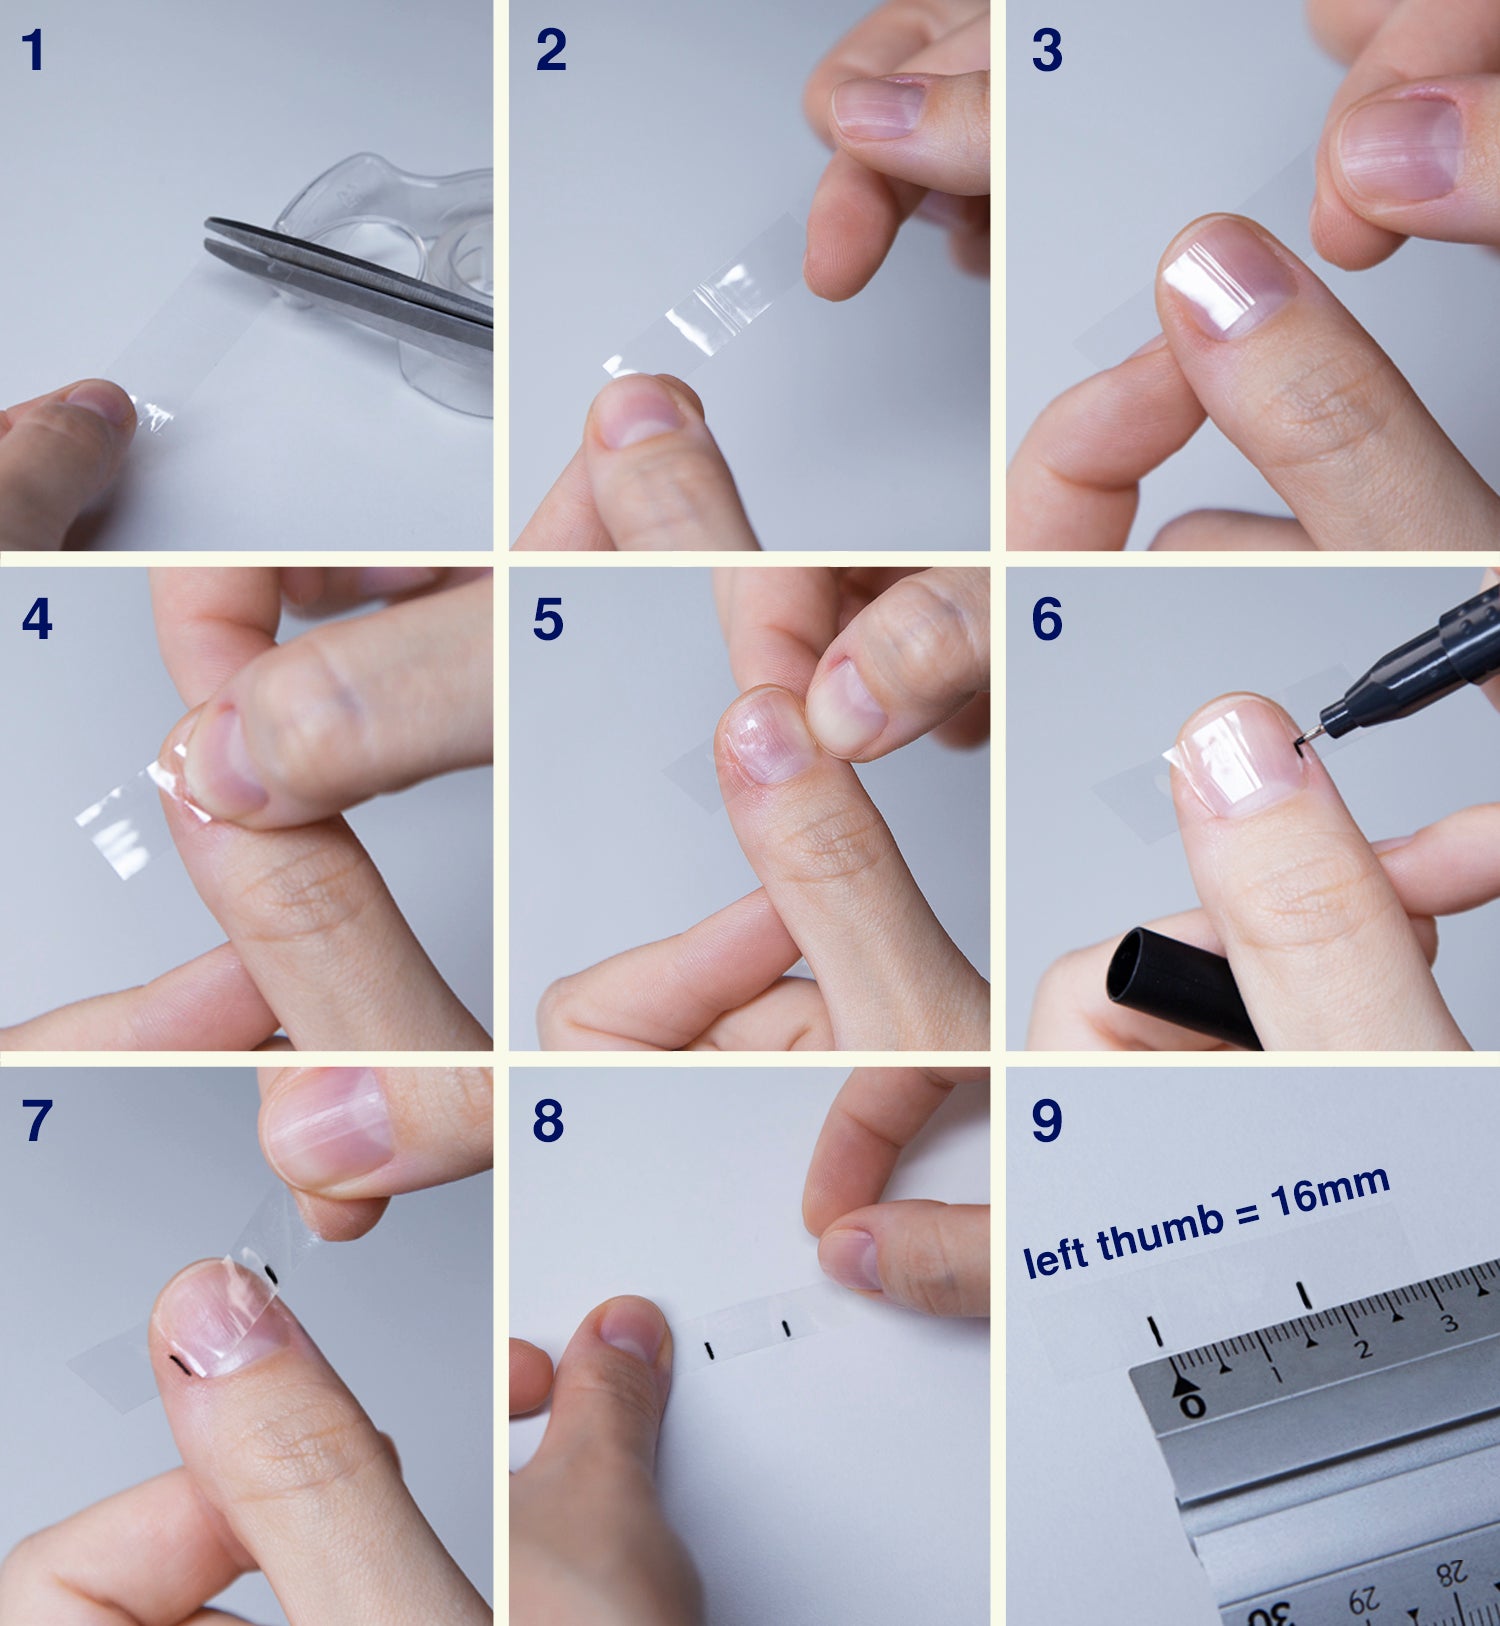
The more, the better
To ensure you get the most accurate sizing, please also measure your nail beds. Make sure you are doing these steps on your natural, bare nails.
- Place a strip of clear tape on top of each nail making sure it's covered side to side.
- Mark the beginning and end of the widest part of each nail bed, whether it's at the top, middle or bottom of your nail.
- Peel off the tape and place it on a flat surface. Using a ruler, measure in millimetres the distance between markings and write it down for each of your nails like in the example.
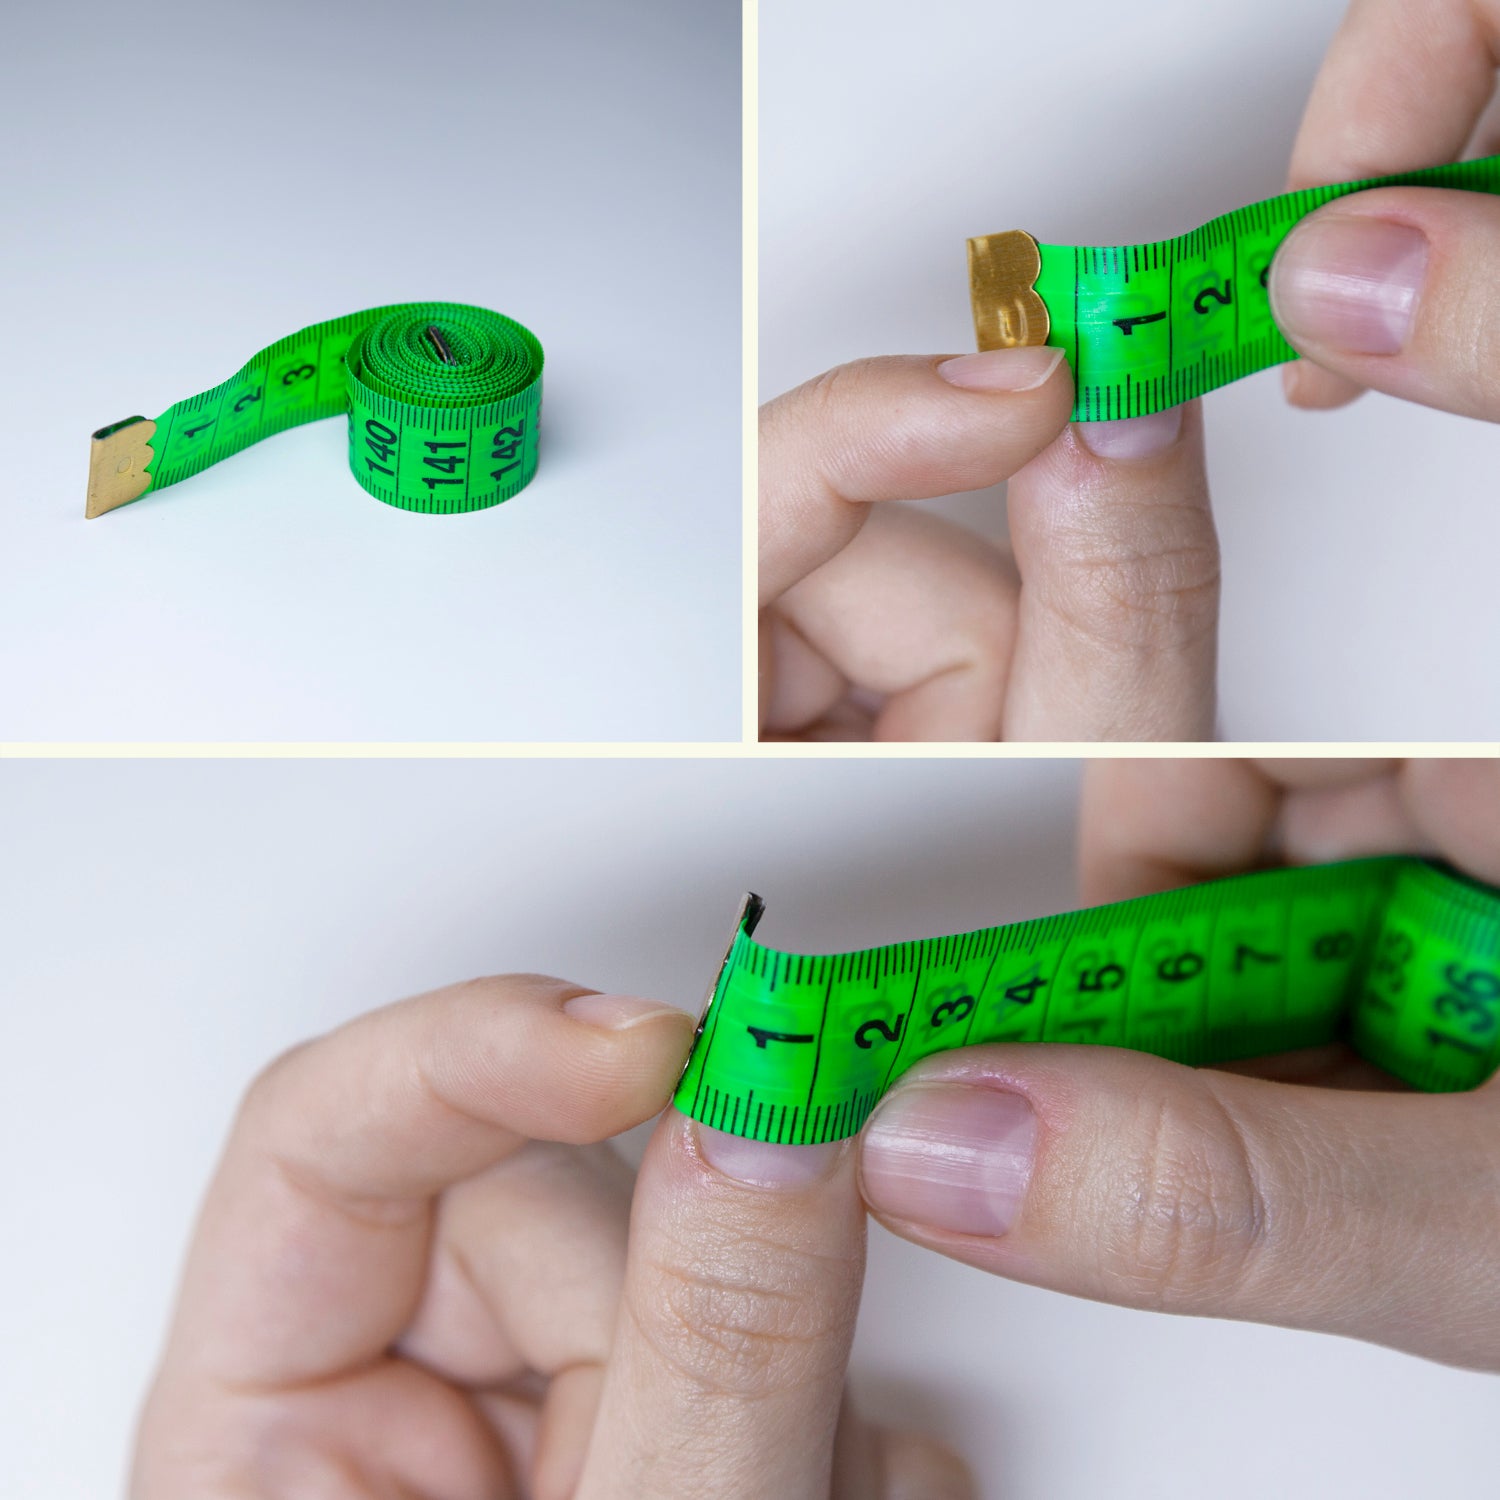
No clear tape? No problem!
If you do not have clear tape around, you can use a sewing measuring tape to size your nail beds as shown in this tutorial picture.
Measure at the widest part of your nail from one edge to the other.
